
Search Blog
Quick Inquiry
Chat on WhatsAppHot Products
About Us
Zhanjiang Group is a professional manufacturer of smart access control systems with 10+ years of experience, providing high-quality automatic gates, boom barriers for global industrial, commercial and residential projects.
Read More →The Complete Installation Process of Automatic Rising Bollards
Introduction
Automatic bollards are widely used for factory entrances, school campuses, government compounds, stadiums and parking lot traffic access control. Proper installation directly affects the service life, waterproof performance and collision resistance of bollards. This blog sorts out the full standardized automatic retractable bollards construction steps for your engineering reference, covering foundation backfilling, wiring, drainage testing and pavement restoration.
Step 1: Preliminary investigation and Foundation pit excavation
- On-site underground exploration
Before construction use the Professional pipeline detector to check the construction area of the underground power lines,water pipe and other underground, Flexibly adjust the location of the foundation pit; simultaneously plan the entire drainage system to avoid water accumulation and damage to equipment later.
Excavation Standards for Foundation Pit Dimensions
The width of the excavation pit is uniformly 60-80cm, and the length is customized according to the number of lifting bollards. The formula for calculating the pit depth is: equipment embedment depth + 20cm. For example, if the embedment depth of the lifting bollard is 80cm, the total excavation depth of the pit must reach 100cm.Construction of permeable drainage layer
Drainage Solutions for Hydraulic Rising Automatic Bollards
| Drainage Type | Core Principle | Best Application Scenario | Pros | Cons |
|---|---|---|---|---|
| Active Drainage | Sewage pump drains water to sewer | Low-lying zones, coastal high groundwater areas | 100% water removal, stable for rainy regions | Extra pump cost, periodic equipment maintenance |
| Natural Seepage Drainage | Water seeps into underground gravel layer | General park, factory with good soil permeability | No electricity, low construction cost, maintenance-free | Invalid for clay soil & super high water table sites |
| Fully Sealed Zero-Drain | All-sealed lifting column stops water intrusion | Simple ground construction, budget projects | No drainage pit construction, zero after-sales upkeep | Relies on high-quality waterproof sealing components |
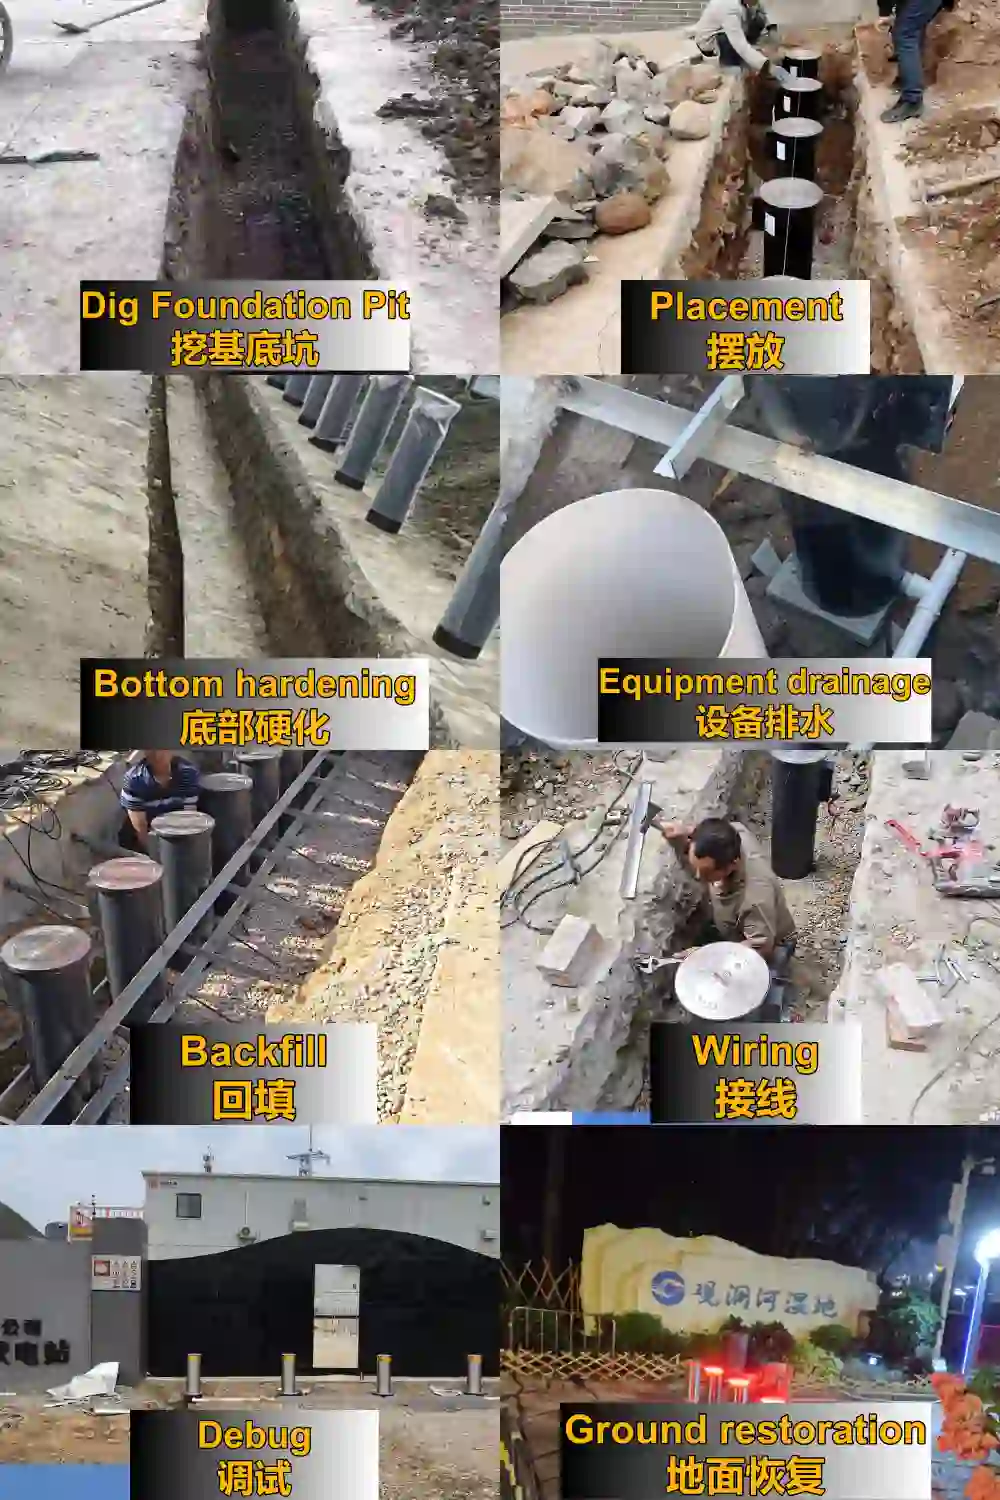
Step2: Construction of Hardening and Settlement Prevention at the Bottom of the Foundation Pit
- After the permeable layer is laid and fully compacted, pour the layered hardened foundation. Taking a pre-embedded 77cm layer and a total pit depth of 110cm as an example: first lay a 20cm thick layer of crushed stone, and mechanically compact it;
- Pour a 10cm thick layer of Grade C concrete on top of the crushed stone layer, and smooth and level the surface;
- Allow the concrete to cure completely before placing the main lifting column equipment. The hardened layer serves to distribute the load and prevent the equipment from sinking or tilting after long-term use.
III. Equipment Placement and Central Drainage System Setup
- Place the entire rising bollard into the hardened pit, and use a level to calibrate the verticality and horizontality of the bollard, adjusting it to ensure there is no tilt.
- Connect a φ50 PVC drainage pipe to the bottom drain outlet on the side of the rising bollard, and connect all pipes to the matching underground water storage tank.
- The water storage tank has a built-in submersible pump to automatically pump out accumulated water, preventing rainwater and groundwater from accumulating and soaking the hydraulic mechanism.


IV. Equipment reinforcement and layered backfilling
- Temporary backfill with sand & fine gravel; add steel mesh reinforcement for heavy-load sites.
- Keep bollard top 3–5 mm above ground to prevent dust/mud blockage.
- Fill 30cm depth with native soil, then pour C40 concrete for permanent fixing after leveling and pipeline check.
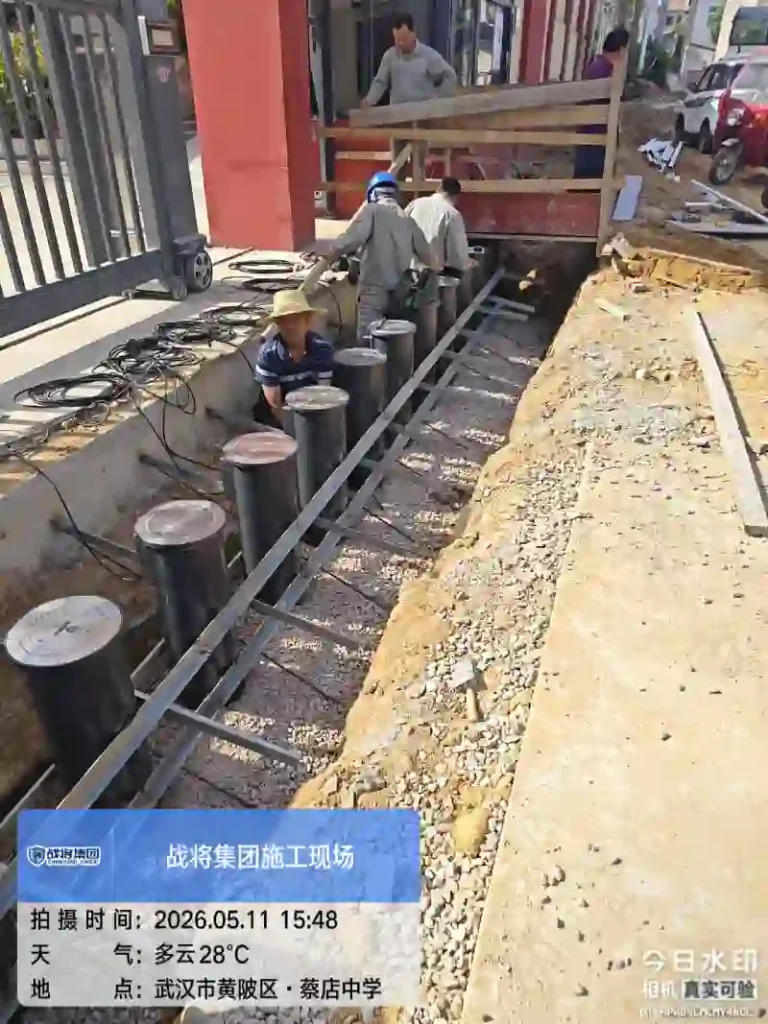
V. Conduit Embedding & Waterproof Wiring Installation
- Conduit & Cable Specification Match main conduit size to the total number of bollards, align conduits with the reserved cable outlets on bollard housing. Standard wiring per single bollard: 1×3×2.5mm² cable + 2×2×1.5mm² cables.
Waterproof Wiring for Rising Bollards
- Unscrew and open the wiring box cover of the rising bollard.
- Fit original waterproof glands on the bollard cable outlets.
- Double-seal cable joints inside the bollard box with two layers of tape.
- Label all cables separately, tidy them in the bollard box after wiring
- Power-On Pre-Test of Rising Bollards
- Link all bollard cables to the central control cabinet, then switch on power for a full function test. Check all key performance including bollard lifting & lowering, limit stop protection and warning indicator lights. Do not start final pavement backfilling until you confirm there are no system malfunctions or electric leakage risks.
VI. Pavement Surface Restoration Construction
Once all rising bollards are fixed and pass full function testing, restore the top pavement using the same material as the original ground (asphalt, concrete or paving tiles). Ensure the finished surface stays flat, with smooth seamless transition between the bollard and road surface without height gaps.
Final Installation Reminders
- Drainage design is the core to avoid bollard internal waterlogging and motor damage; choose the solution according to your site’s geographical environment.
- Double-layer waterproof cable wrapping is mandatory for outdoor construction to avoid short circuits in rainy seasons.
- Strictly follow the 3–5 mm height difference standard, which greatly reduces daily cleaning and mechanical failure rates.
- Complete full-function power testing before pavement pouring, to avoid rework caused by hidden equipment faults after surface restoration.
FAQ
Q1: What are automatic bollards exactly?
A: Automatic bollards are retractable security bollards driven by hydraulic or electric power, which can lift out of or hide under the road surface automatically. They are mainly used to manage vehicle access for campuses, government sites, parking lots and other scenarios to prevent illegal vehicle intrusion.
Q2: How do automatic bollards work in daily operation?
A: They receive control commands from remotes, access control systems or license plate recognition devices. The built-in drive unit pushes the column to rise/fall, and limit sensors lock the position when reaching the upper/lower destination. Warning lights will flash throughout the movement to give safety alerts.
Q3: What drainage options are available for automatic bollard foundation pits?
A: There are 3 common plans: active pump drainage for low-lying areas with high groundwater levels, natural gravel seepage drainage for ordinary soil sites, and fully sealed waterproof models that need no extra drainage structures.
Q4: What cable and waterproof rules should I follow during installation?
A: One bollard needs 1 piece of 3×2.5mm² cable plus 2 pieces of 2×1.5mm² cables. Cable joints need double wrapping with high-voltage waterproof tape and regular electrical tape, and all wires should be labeled clearly for later maintenance.
Q5: Why can’t I restore pavement before power-on pre-test?
A: We need to fully check lifting performance, limit function, warning system and insulation safety first. If faults occur after pavement recovery, it will cause expensive rework on the finished road surface.
If you need customized bollard solutions, installation drawings or free professional technical guidance for factory and large engineering projects, check our [Automatic Bollards ] or contact us via WhatsApp:+8618927792680